Thank you for using WP School Calendar, a powerful and easy-to-use WordPress plugin to create school calendar. Our goal is to help you create beautiful responsive school calendar for your school website in minutes without hiring a graphic designer.
If you need assistance with your plugin, please contact us.
In this article we will help you learn more about WP School Calendar. The documentation for this plugin has been broken down into the following sections:
- What Is WP School Calendar
- How to Install WP School Calendar
- How to Activate License WP School Calendar Pro
- How to Create School Calendar for The First Time
- How to Display School Calendar On Your Page
- How to Add/Edit Important Dates
- How to Change Date Format
- What are Categories and Groups
- How to Add Image Logo to PDF Calendar
- How to Translate WP School Calendar
- How to Update WP School Calendar
- Troubleshoot With Cache Plugins
What Is WP School Calendar
WP School Calendar is simple and responsive school calendar plugin for WordPress. You can use this plugin to create school calendar automatically and show it on your school website.
Over the years, we found that creating the school calendar is very difficult and not everyone can do that because they don’t have skill in graphic designing. You have to hiring a graphic designer to create school calendar for your school website.
So we started to develop WP School Calendar with simple goal to take the pain out of creating school calendar and make it easy.
Here are main features of WP School Calendar:
- Supports single and multiple day important date
- Categorized important dates
- Custom colors for each important dates
- Customize start / end of the school calendar
- Various options for month format
- Various options for weekday format
- Various options for date format
- Ability to show tooltip on important dates (Pro version)
- Ability to show past and upcoming school calendars (Pro version)
- Ability to export school calendar into PDF format (Pro version)
- Ability to export school calendar to iCalendar format (Pro version)
- Ability to add school calendar to Google Calendar (Pro version)
- Custom language text support and includes POT file for further customization
It is very easy to use WP School Calendar. All that’s needed is to add some important dates on the calendar when the activities or events will be held in the school, such as:
- Registration for new students
- Orientation period for new students
- First and last day of courses
- Mid and final term examination
- Results publication date
- School holiday period
- Other important dates
The important dates will be displayed automatically on the page that you specify.
How to Install WP School Calendar
At this stage, we are assuming that you have installed WordPress on your server. You will need WordPress v4.6.1 or newer to install WP School Calendar.
After purchasing WP School Calendar Pro, you will be sent 2 emails. The first will provide you with a link to download the plugin, along with your license key.
The second email, which you’ll receive after the payment is successfully processed, will provide a receipt, as well as a secure link to download your PDF invoice.
Next, click on the download link to save a zipped file of WP School Calendar Pro plugin to your computer.
Note: In some cases, this file may unzip as you download it, and instead appear as a regular folder. However, the folder must be zipped to use the WordPress plugin uploader. For instructions, please check out these instructions for Windows or Mac operating systems.
Once you have the zip file, navigate to the site where you want to install WP School Calendar Pro. In your WordPress dashboard, go to Plugins > Add New.
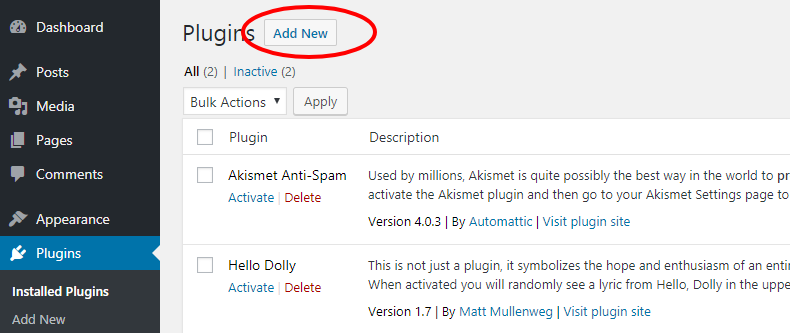
On the next screen, click the Upload Plugin button.
You will see the option to upload the plugin. Click on the Choose File button and select your WP School Calendar Pro zip file.
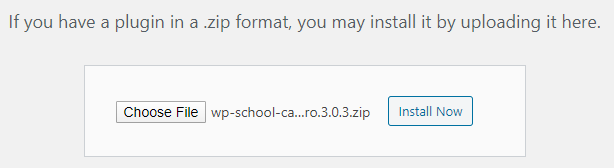
After your file is uploaded, click on the Install Now button. WordPress will complete the installation process for you. Once uploaded, click the Activate Plugin button.
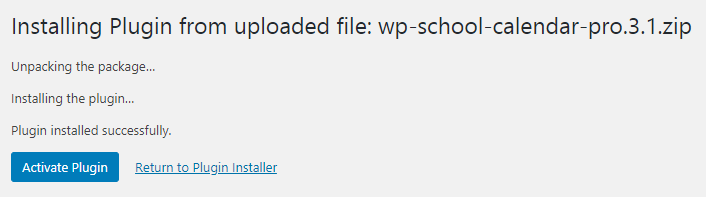
Now you have completed the installation of WP School Calendar Pro.
How to Activate License WP School Calendar Pro
If you’ve purchased the product directly within the WP Admin dashboard you are already good to go since the license key is automatically activated right after the upgrade.
Otherwise, after activating the product you will see notification like the image below.
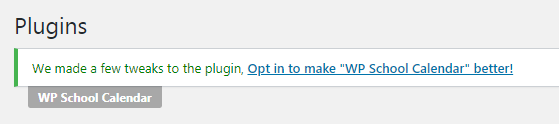
Click the “Opt in to make WP School Calendar better” and you will be redirected to a license activation screen.
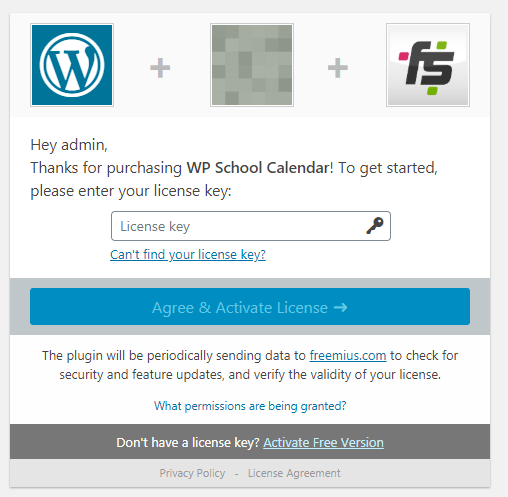
Simply enter the key provided in your email and click Agree & Activate License. Your product will now be activated and you’ll be ready to begin setting it up.
How to Create Calendar
To create calendar, go to School Calendar > All Calendars. This page will show the list of calendar on your WordPress site. To create new calendar, click Add New button.
You will see the calendar editor and various options that you can use to customize the appearance of your calendar.
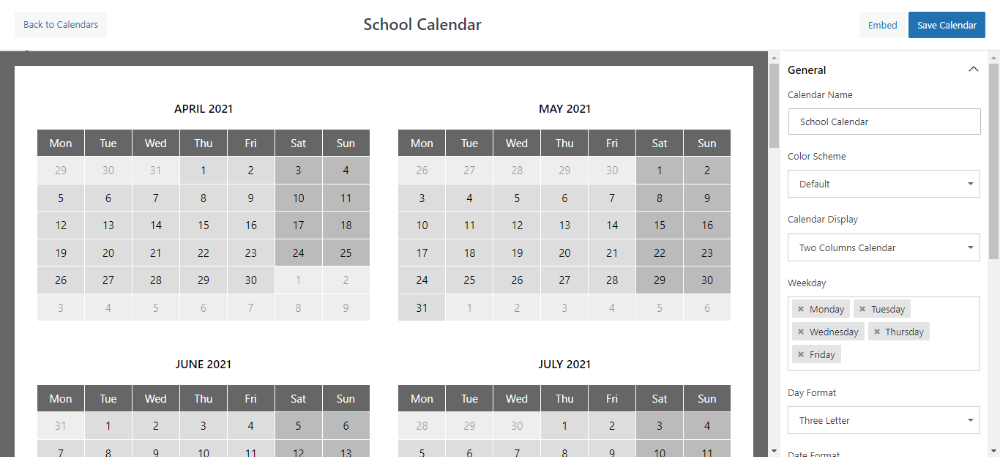
Once you have finished setting up the calendar display, click the Save Changes button to save your calendar settings. Next, use the shortcode [wp_school_calendar id="CALENDAR_ID"] or Gutenberg block to display the calendar on your WordPress page.
How to Display Calendar
The calendar you have created does not automatically appear on your WordPress page. You have to insert the calendar using shortcode or Gutenberg block.
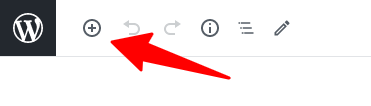
If you are using Gutenberg blocks, the first step is to create a new WordPress page or edit an existing one. Once, you have opened the editor, you can add a new block by clicking the + (plus) icon in the upper left corner.
Once you have clicked this icon, a menu of block options will display. To locate the WP School Calendar block, you can search WP School Calendar or open the Widgets category. Then click the block named WP School Calendar.
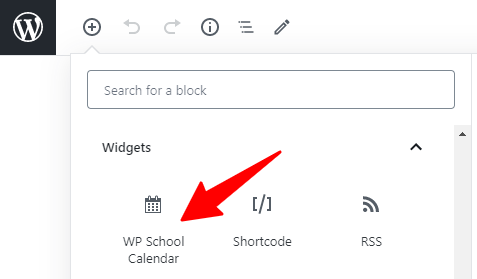
This will add the WP School Calendar block to the editor screen. Choose the calendar from the dropdown menu. Publish the page and visit your website to see your calendar in action.
You can also use shortcode to display calendar on your site. All you will need to do is add shortcode [wp_school_calendar id="CALENDAR_ID"] to any page or post.
How to Add/Edit Important Dates
Important dates are events or activities that occur during one calendar year, for example, new student admissions, exams, school holidays and so on.
You have to add these important dates one by one so that they appear on the school calendar.
It’s very easy. First, click the School Calendar > Important Dates menu to display the list of important dates you’ve created. The screen below will appear.

To add an important date, click the Add New Important Date button at the top of the list of important dates. The important date editor will appear, as shown below.
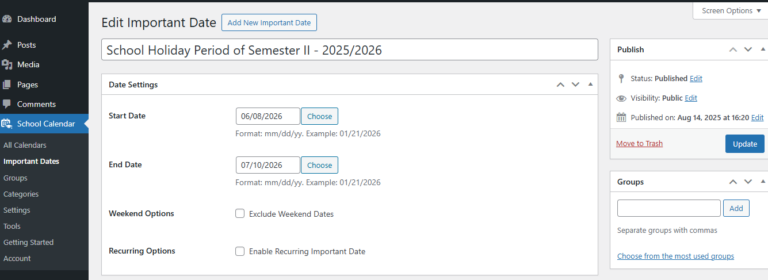
Set the important date settings then click the Publish or Update button to save it.
How to Change Date Format
There are 6 date formats that you can use in the school calendar, namely as follows:
- Short (Example: 11/30)
- Medium (Example: Nov 30)
- Long (Example: November 30)
- Short Alt (Example: 30/11)
- Medium Alt (Example: 30 Nov)
- Long Alt (Example: 30 November)
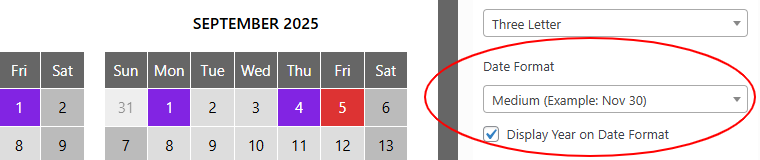
You can change the date format via the calendar editor in the Appearance section as shown in the image below.
What are Categories and Groups
WP School Calendar uses the terms Categories and Groups to create groupings on the school calendar.
Groups are basically used to create multiple calendars on a single website page.
For example, you create a school website for an educational foundation that has several levels of education, namely Play Group, Kindergarten, Elementary School and Middle School. Each level of education has a different schedule of activities and important dates.
Using the Groups feature, you can create school calendars for all levels of education on a single website page. In the case above, you’ll need to create four groups:
- Group 1: Play Group Calendar
- Group 2: Kindergarten Calendar
- Group 3: Elementary Calendar
- Group 4: Middle School Calendar
Therefore, it can be said that the Groups feature has a very specific use and it is very likely that you will not need it if your school only has one level of education.
Unlike Groups, Categories are used to group important dates on the school calendar. These categories are displayed as a list and use specific colors.
How to Add Image Logo to PDF Calendar
The school calendar editor has a feature to add image or logo to PDF calendar. This feature is located in the PDF Settings section, as shown below.
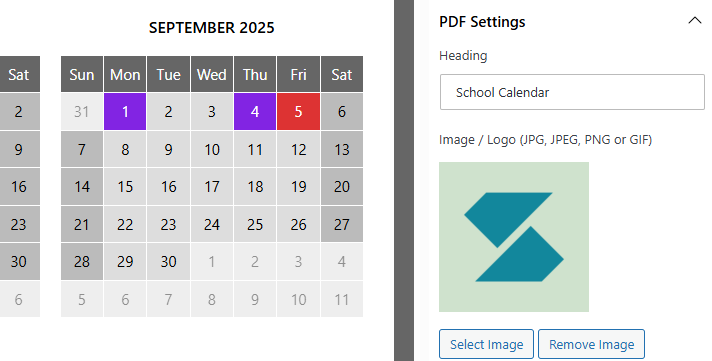
If you want to use this feature, make sure that the image is in JPG, PNG or GIF format.
If you are using GIF format and an error occurs while downloading the PDF calendar, it is possible that your server does not have the PHP module required to display GIF images in PDF.
If that happens, the solution is to change the GIF image format to PNG and reset your calendar settings.
How to Translate WP School Calendar
WP School Calendar has full translation and localization support via the “wp-school-calendar” textdomain. All that’s needed is a translation file for your language.
Please note that you don’t need translate name of the days and months. WP School Calendar will use default WordPress translation file to translate name of the days and months.
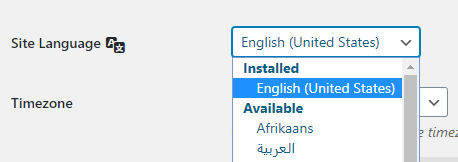
The first step to use WP School Calendar in your language is to tell WordPress which language it should run. Go to Dashboard > Settings > General and change the Site Language setting.
Once this has been done, WP School Calendar displays in your locale if the language file exists. Otherwise, you need to create the language files.
There are several methods to create a translation file. But the easiest method is to use a plugin called Loco Translate.
First, add Loco Translate plugin from the WordPress admin via Plugins > Add New.
Once you have installed and activated Loco Translate on your WordPress, go to the new Loco Translate menu item created in your Dashboard.
Go to the Plugins section, and select WP School Calendar.
Add new languages using the New Language link. Choose the language to add in the list, or enter the language ISO code (ex: fr_FR, en_US etc…), and select the folder to add the translation files to, and click Start Translating.
Note that Loco Translate offers three different locations for your create the translating. The best choice is Other if you are looking to have your own custom translating. You should avoid Author location since it’s inside the plugin and will be override on updates.
Click Save button when finished.
Note that when a new version of WP School Calendar is released and updated on your site, you need refresh the .po file to look for new strings. Use the Sync button to find any new string to start translating.
How to Update WP School Calendar
Plugin updates will become available automatically through your WordPress admin dashboard. When one is available, simply click Update Now. As long as you have an active license, it will update to the latest version.

Troubleshoot With Cache Plugins
Sometimes the cache plugins (for example WP Super Cache, W3 Total Cache, WP Rocket, LiteSpeed Cache, etc) are conflicting with WP School Calendar.
Some customers said that they have some trouble with their school calendar plugin not loading on their site. When they switch between school years, the next school year does not always load, but just displays the “Loading” screen.
If you get the same issue, then your problem is related to caching.
WP School Calendar uses WordPress Nonce to secure the AJAX request. A new WordPress Nonce gets generated every 12 hours, but each WordPress Nonce is still valid for 24 hours. So, if you install caching plugin on your WordPress site make sure to set the cache to expire in under 12 hours. Other solution, you can exclude the calendar page from the cache.